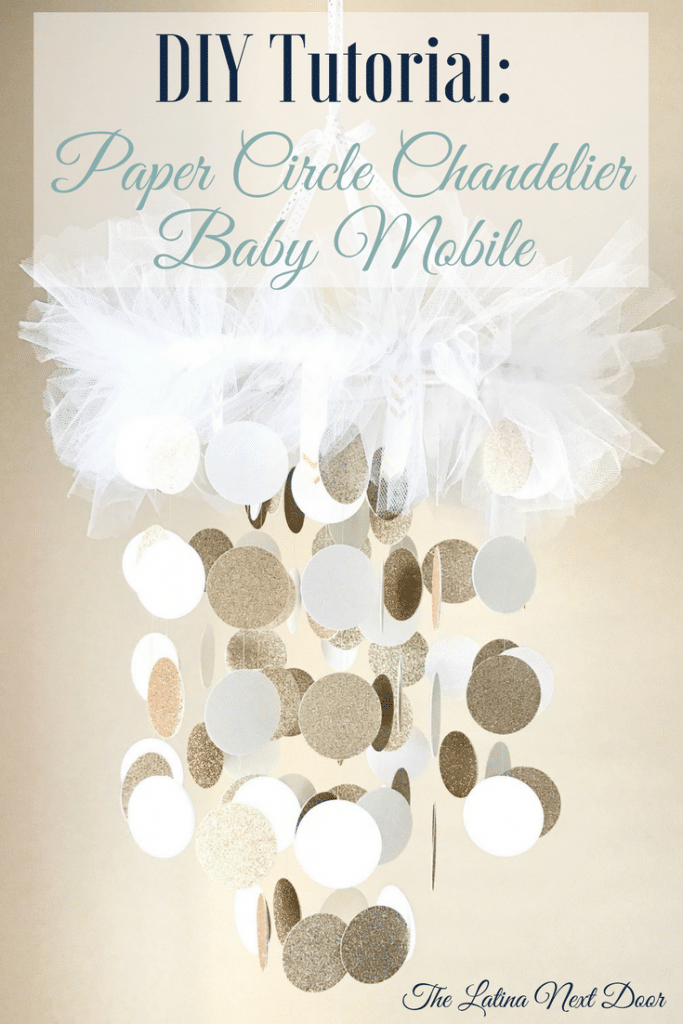
DIY Baby Mobile
“I’m so happy to have Yami from The Latina Next Door as a guest poster today. She has such a creative mind and I just know you all are going to love her beautiful diy baby mobile! “
Hello! I am super excited to be guest posting for Carissa today!
I have been working on adding more character to my children’s rooms recently.
My one-year-old daughter has a pretty simple nursery and I thought it would be nice to add something really sparkly and princess-like to her room and what better way to do it than with a sparkly DIY Circle Chandelier Mobile!
DIY Cirle Chandelier Instructions
So, as I usually do, I set off to Hobby Lobby in search of some supplies.
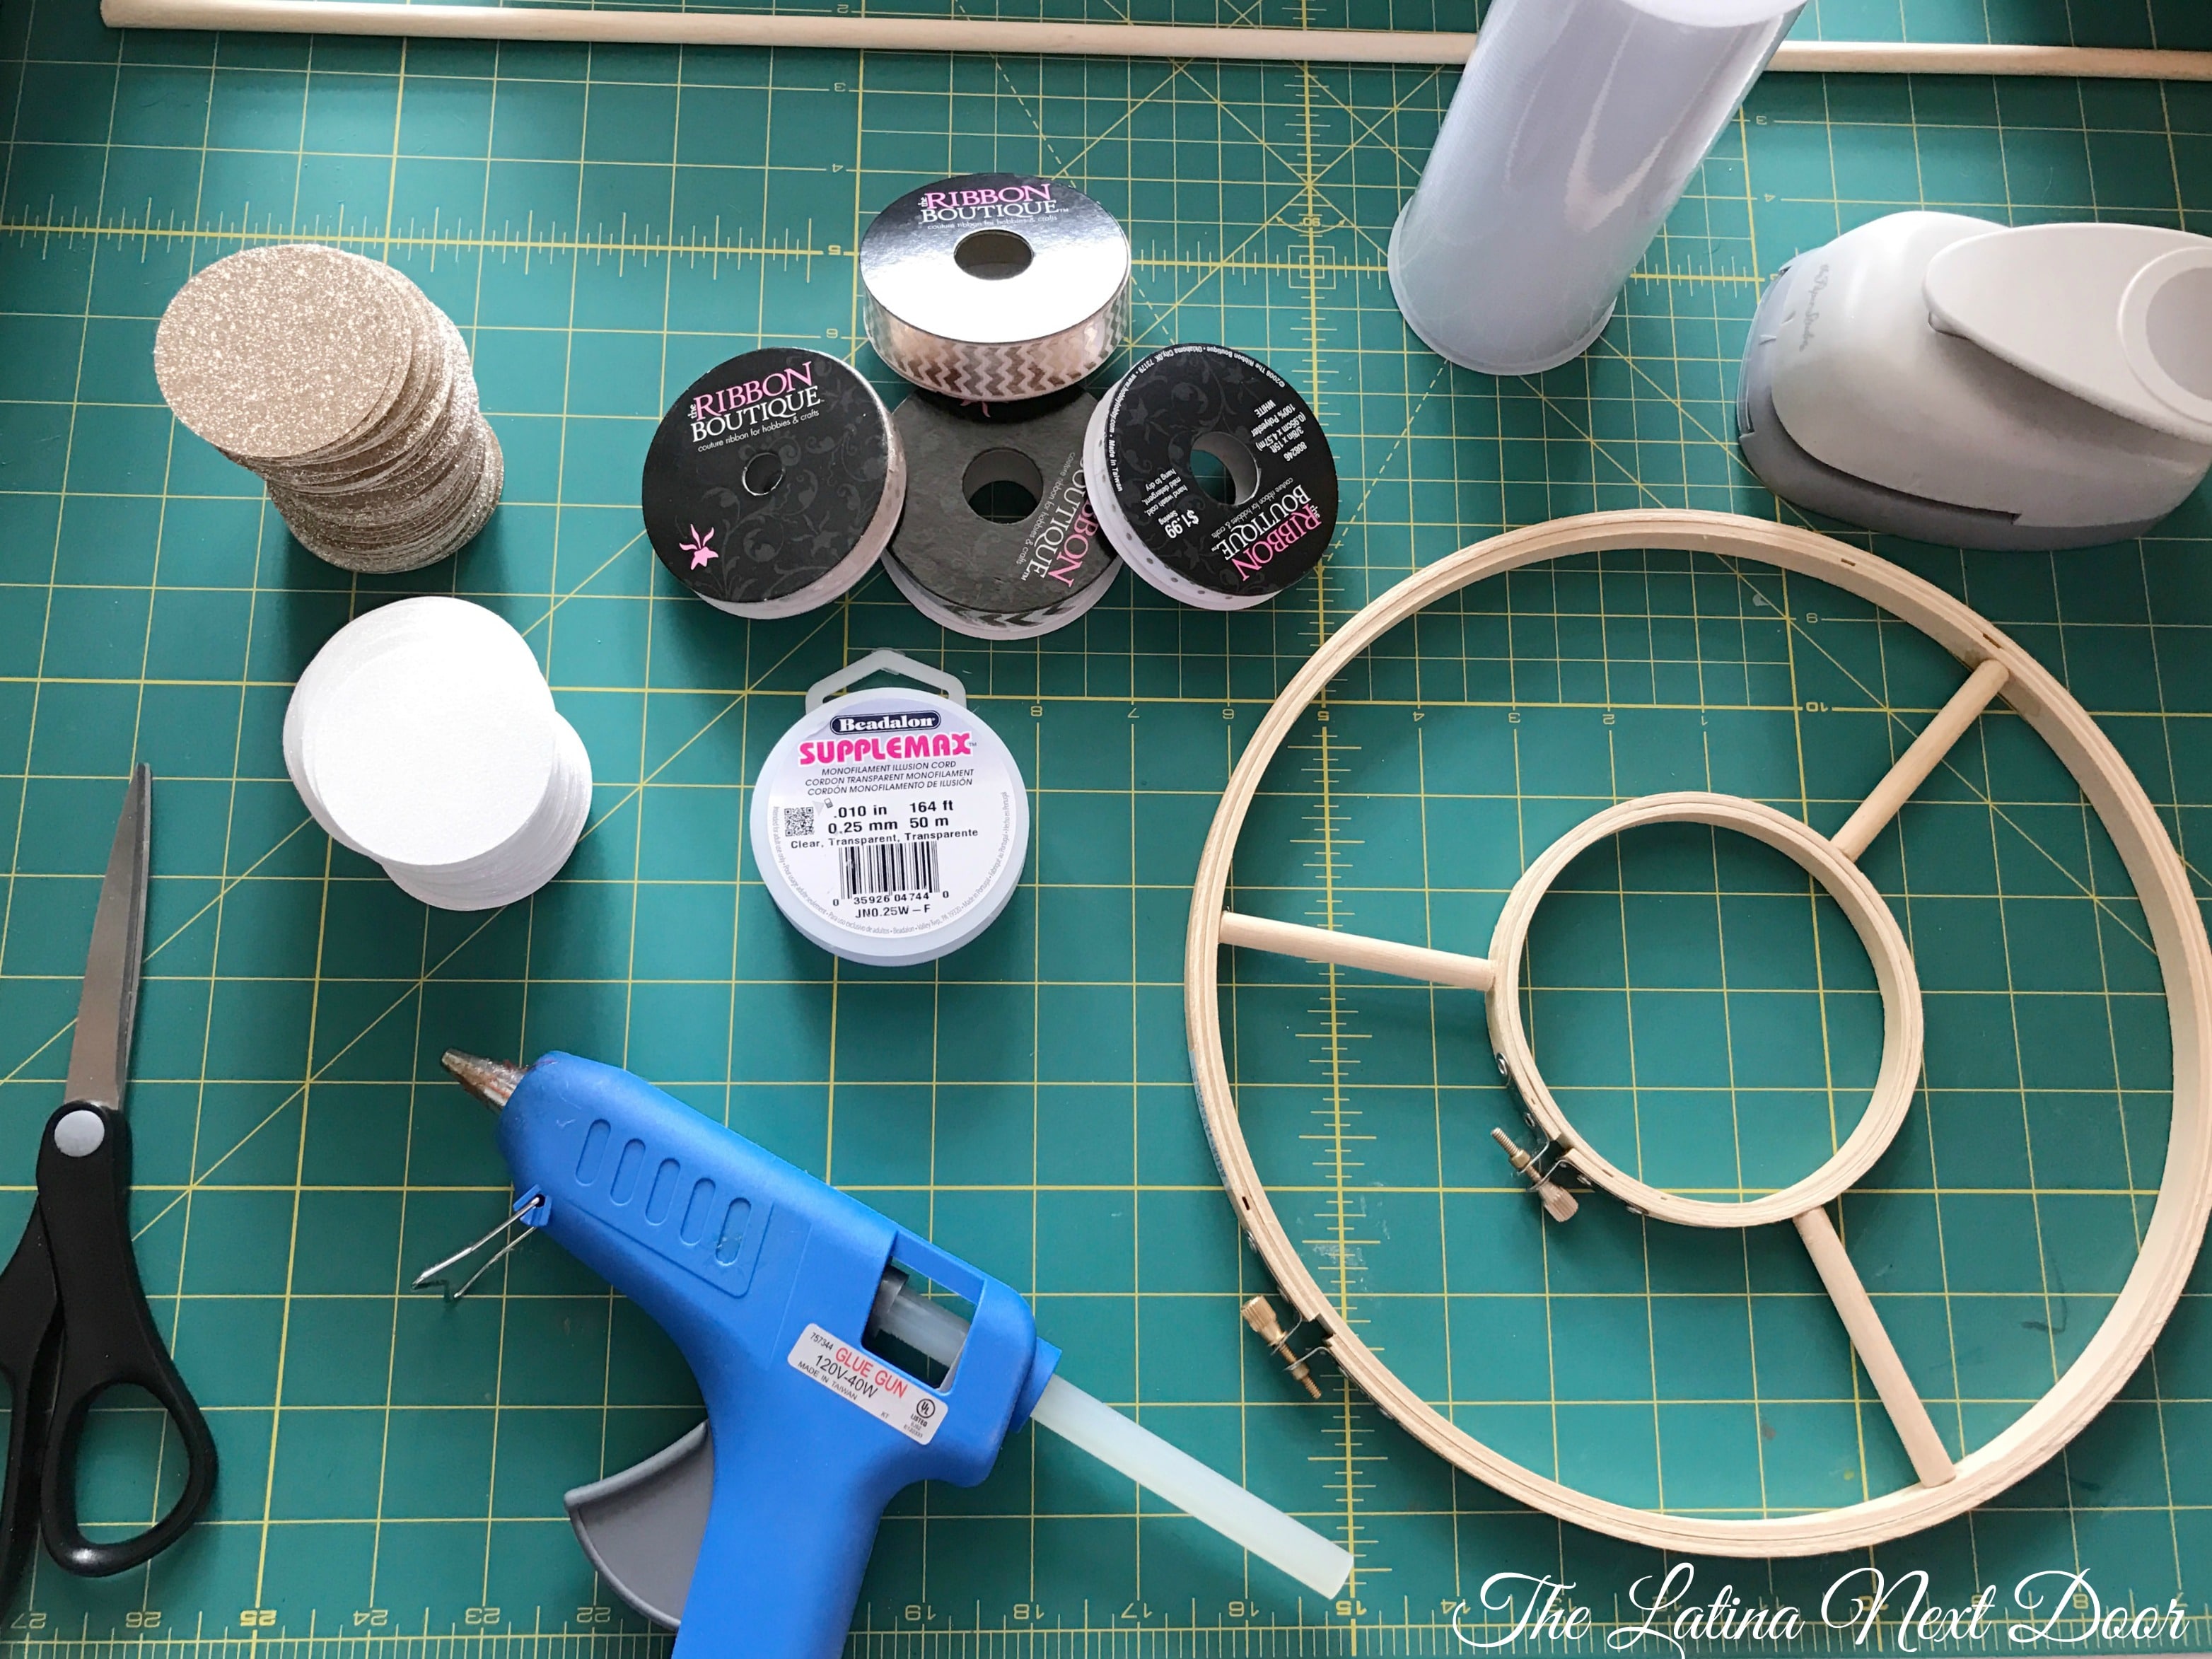
Here’s what you need:
- Two Wooden Embroidery Hoops, 4” and 10”
- 1 Dowel 5/16”
- Monofiliment Cord (basically transparent jewelry making cord) size: 0.25 mm
- Ribbon (1 used 3 types, 1 to hang, 1 to cover the embroidery hoops and 1 to add to the mobile as decoration
- 8 sheets of 12” x 12” Glitter cardstock (I used 2 colors)
- Hole Punch 2”
- Scissors
- Glue Gun & Glue Sticks
- Wood Glue
- One Spool of Tulle
- Small White Hook (for hanging)
The little girl’s hand is optional. My 5-year-old daughter always wants to make it in my posts and always sneaks a hand in my photos. She’s the best DIY assistant hands down though!
Time needed: 2 hours
How to DIY Baby Mobile
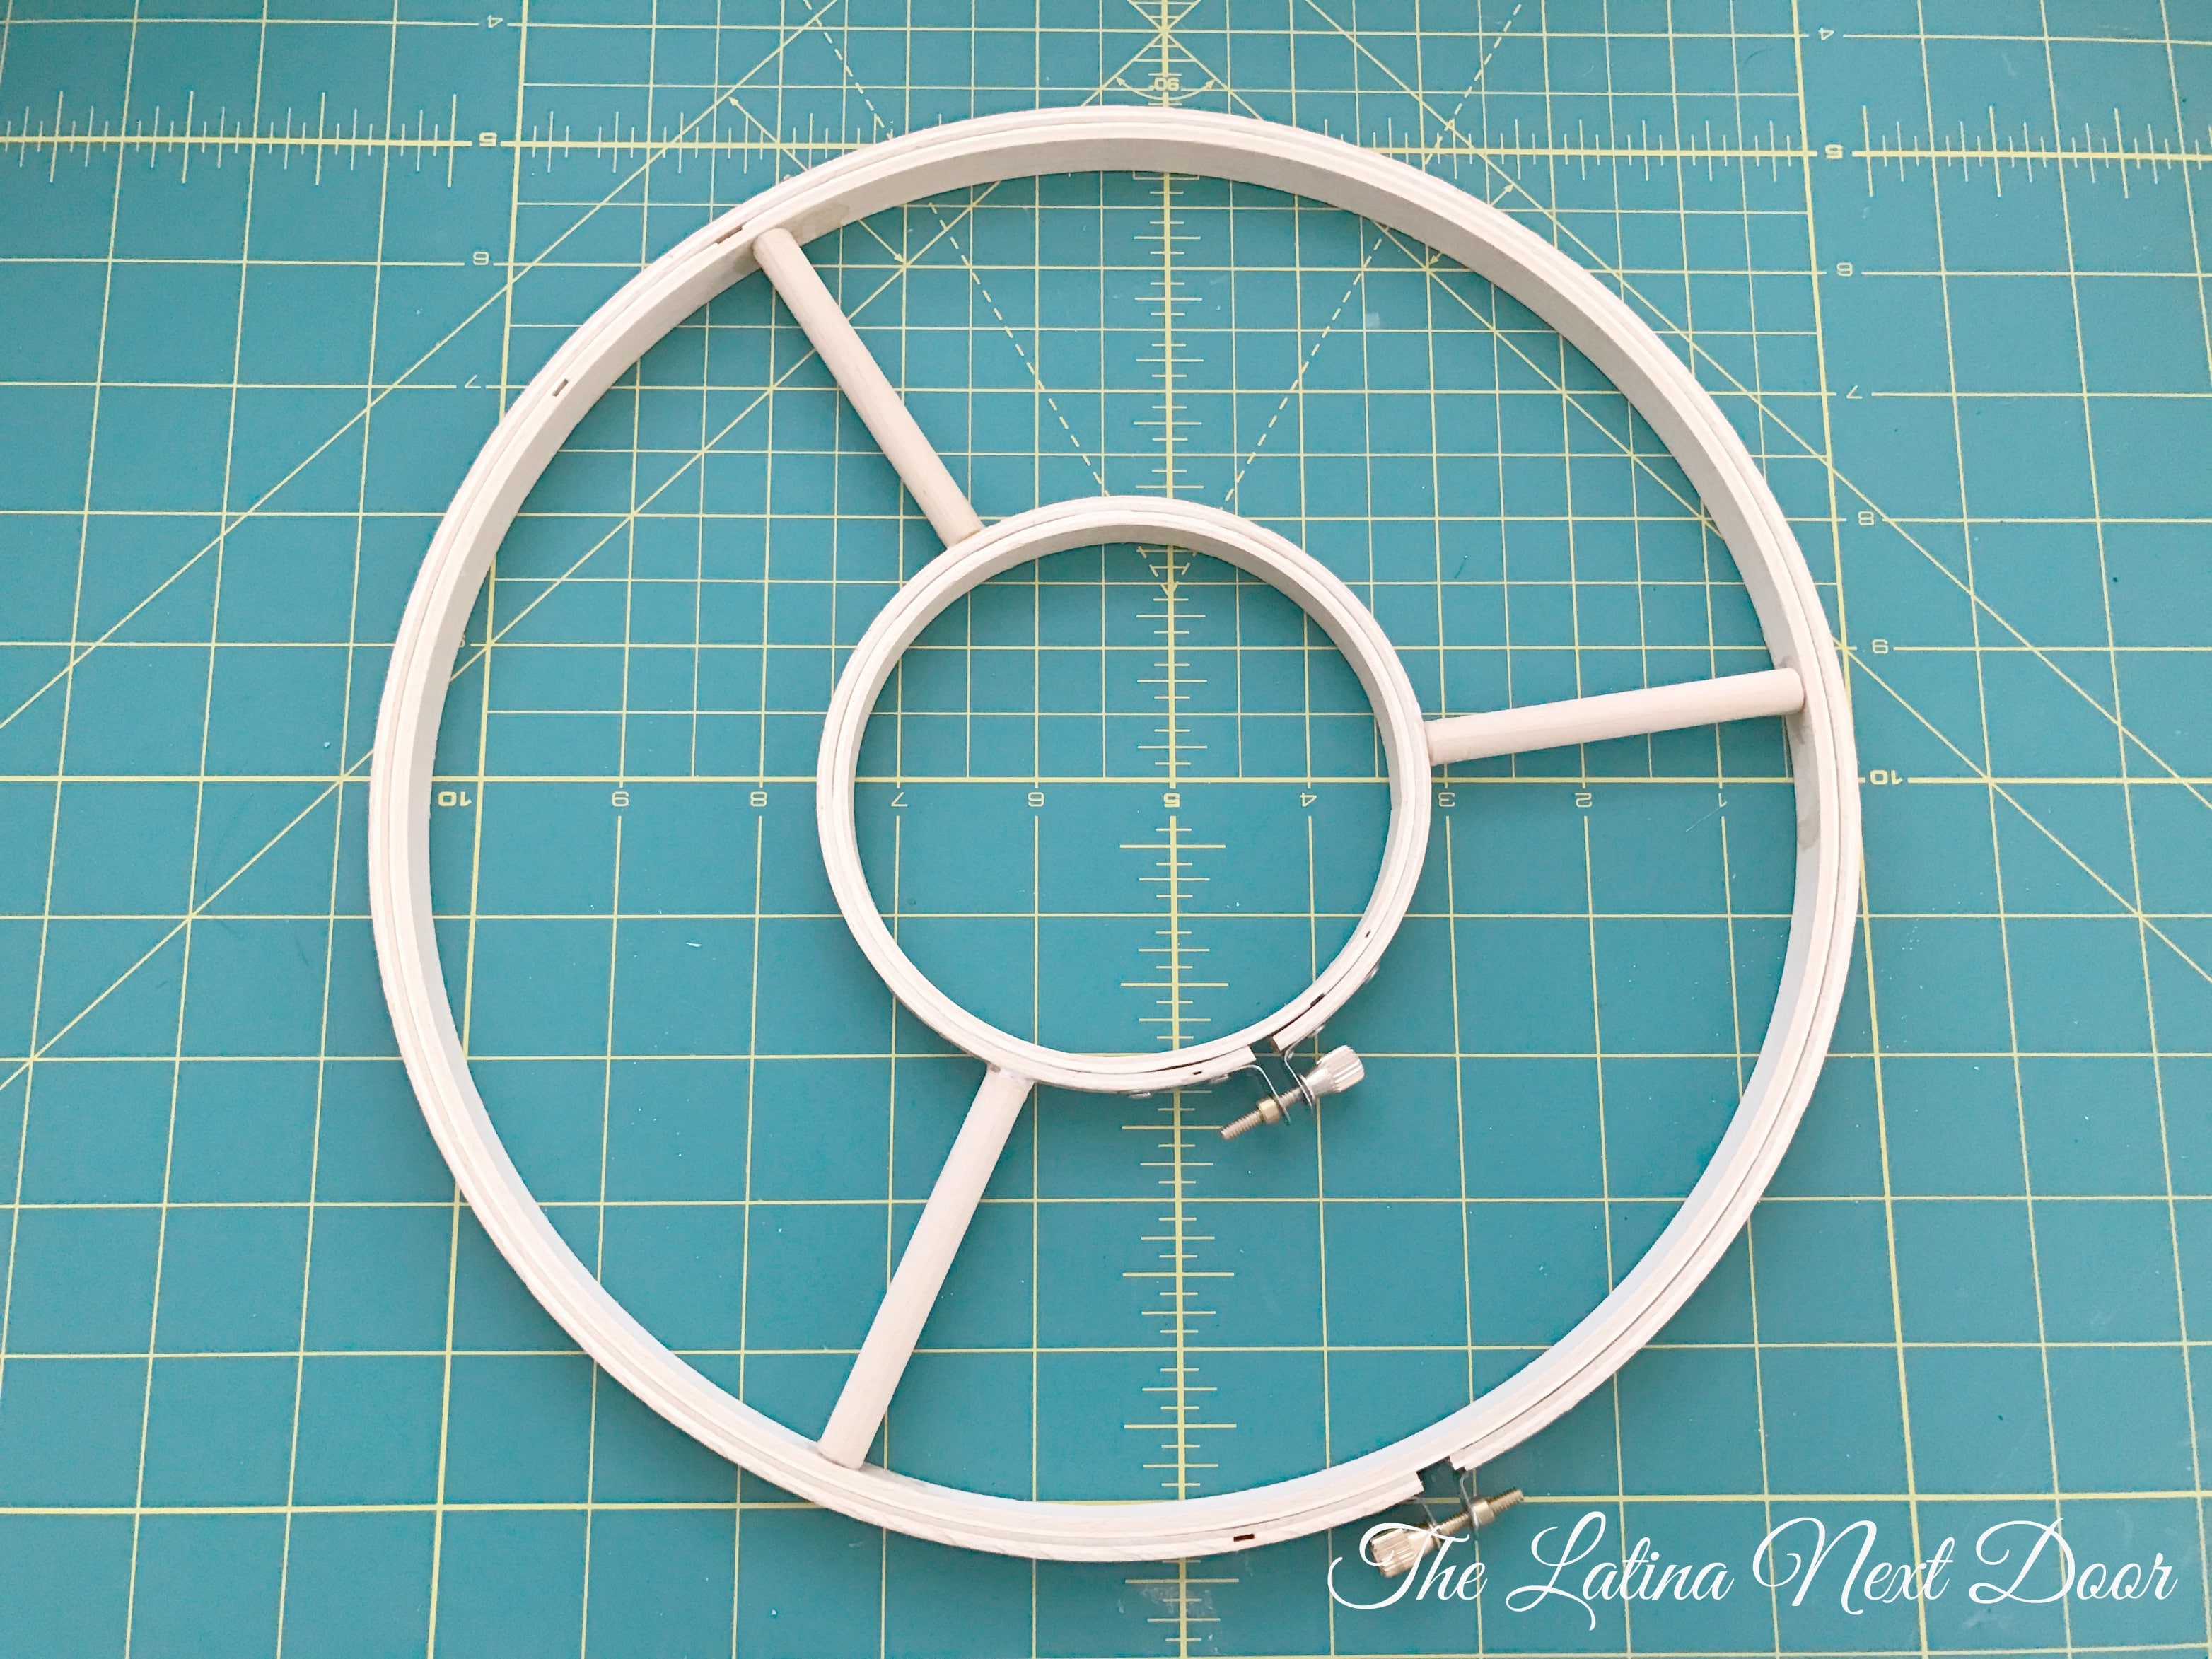
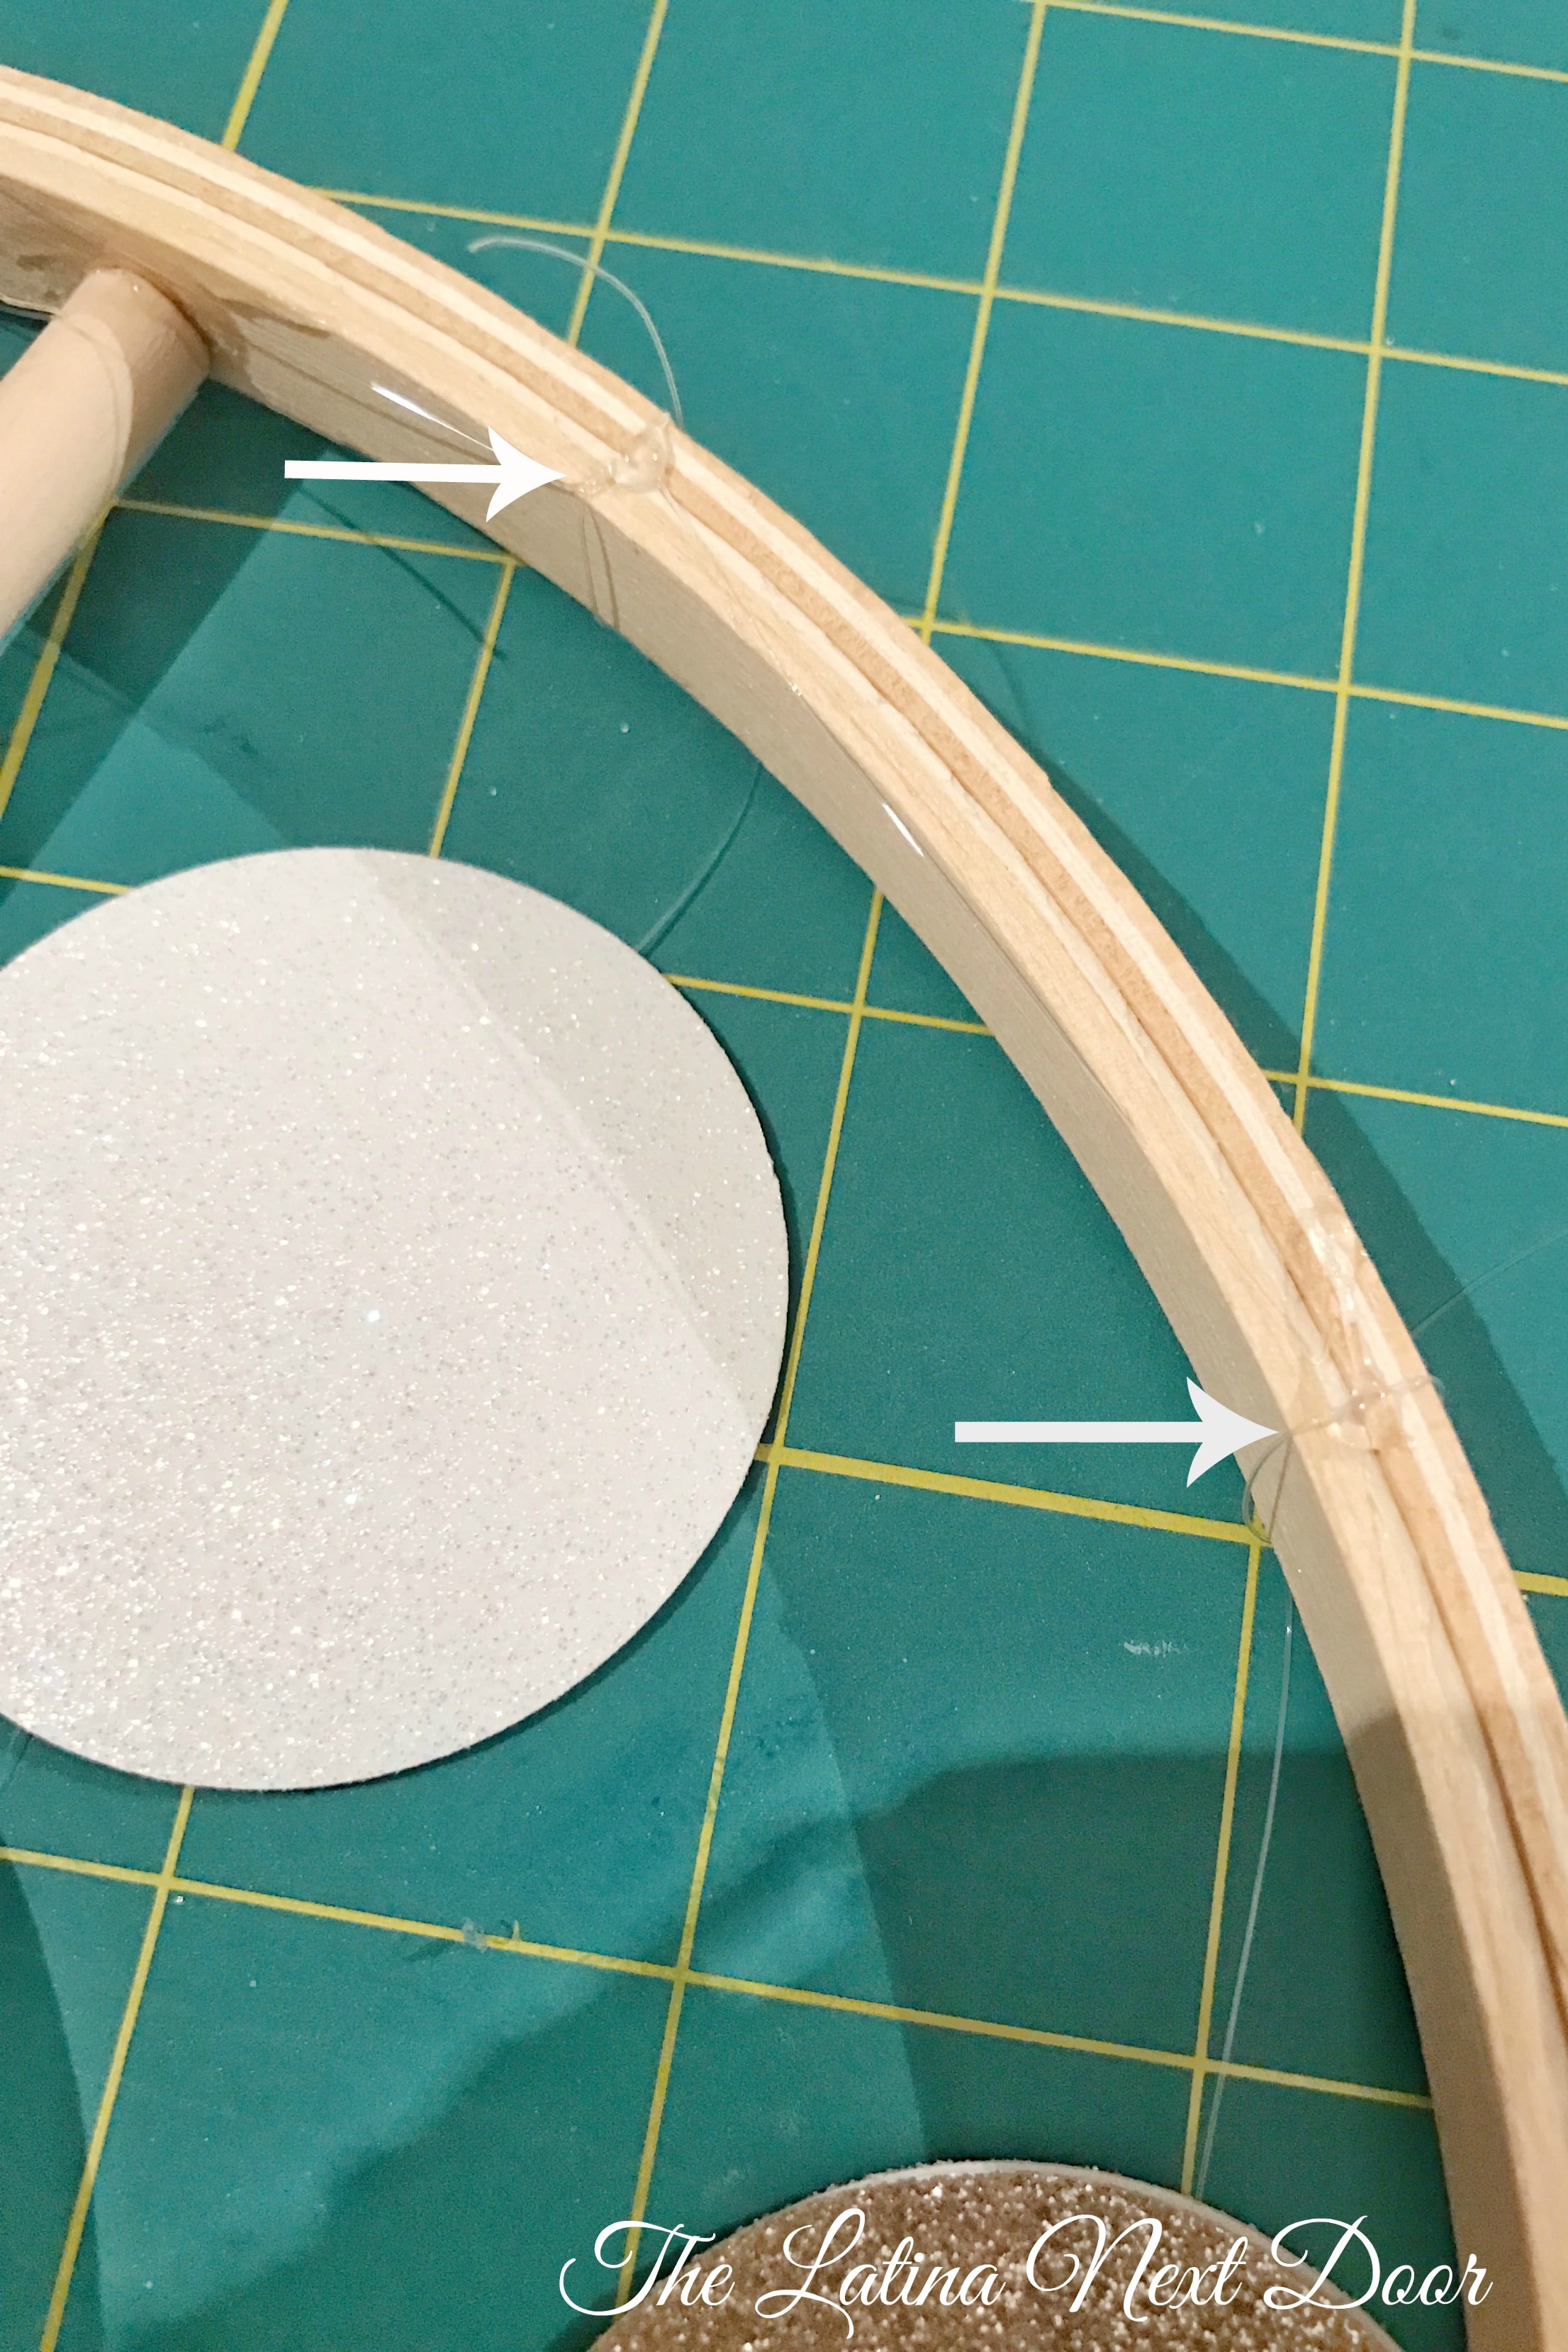
- Attach smaller hoop to larger hoop.
Cut 3 pieces of your dowel so that you can attach the smaller hoop to the larger one as you see below. I used the wood glue for this. (Note: You can choose to remove the outer ring or leave it on as I did. I left them on because I wanted a thick sturdy crown and the metal pieces didn’t bother me. Plus, they get hidden by the tulle later, so it’s completely up to you).

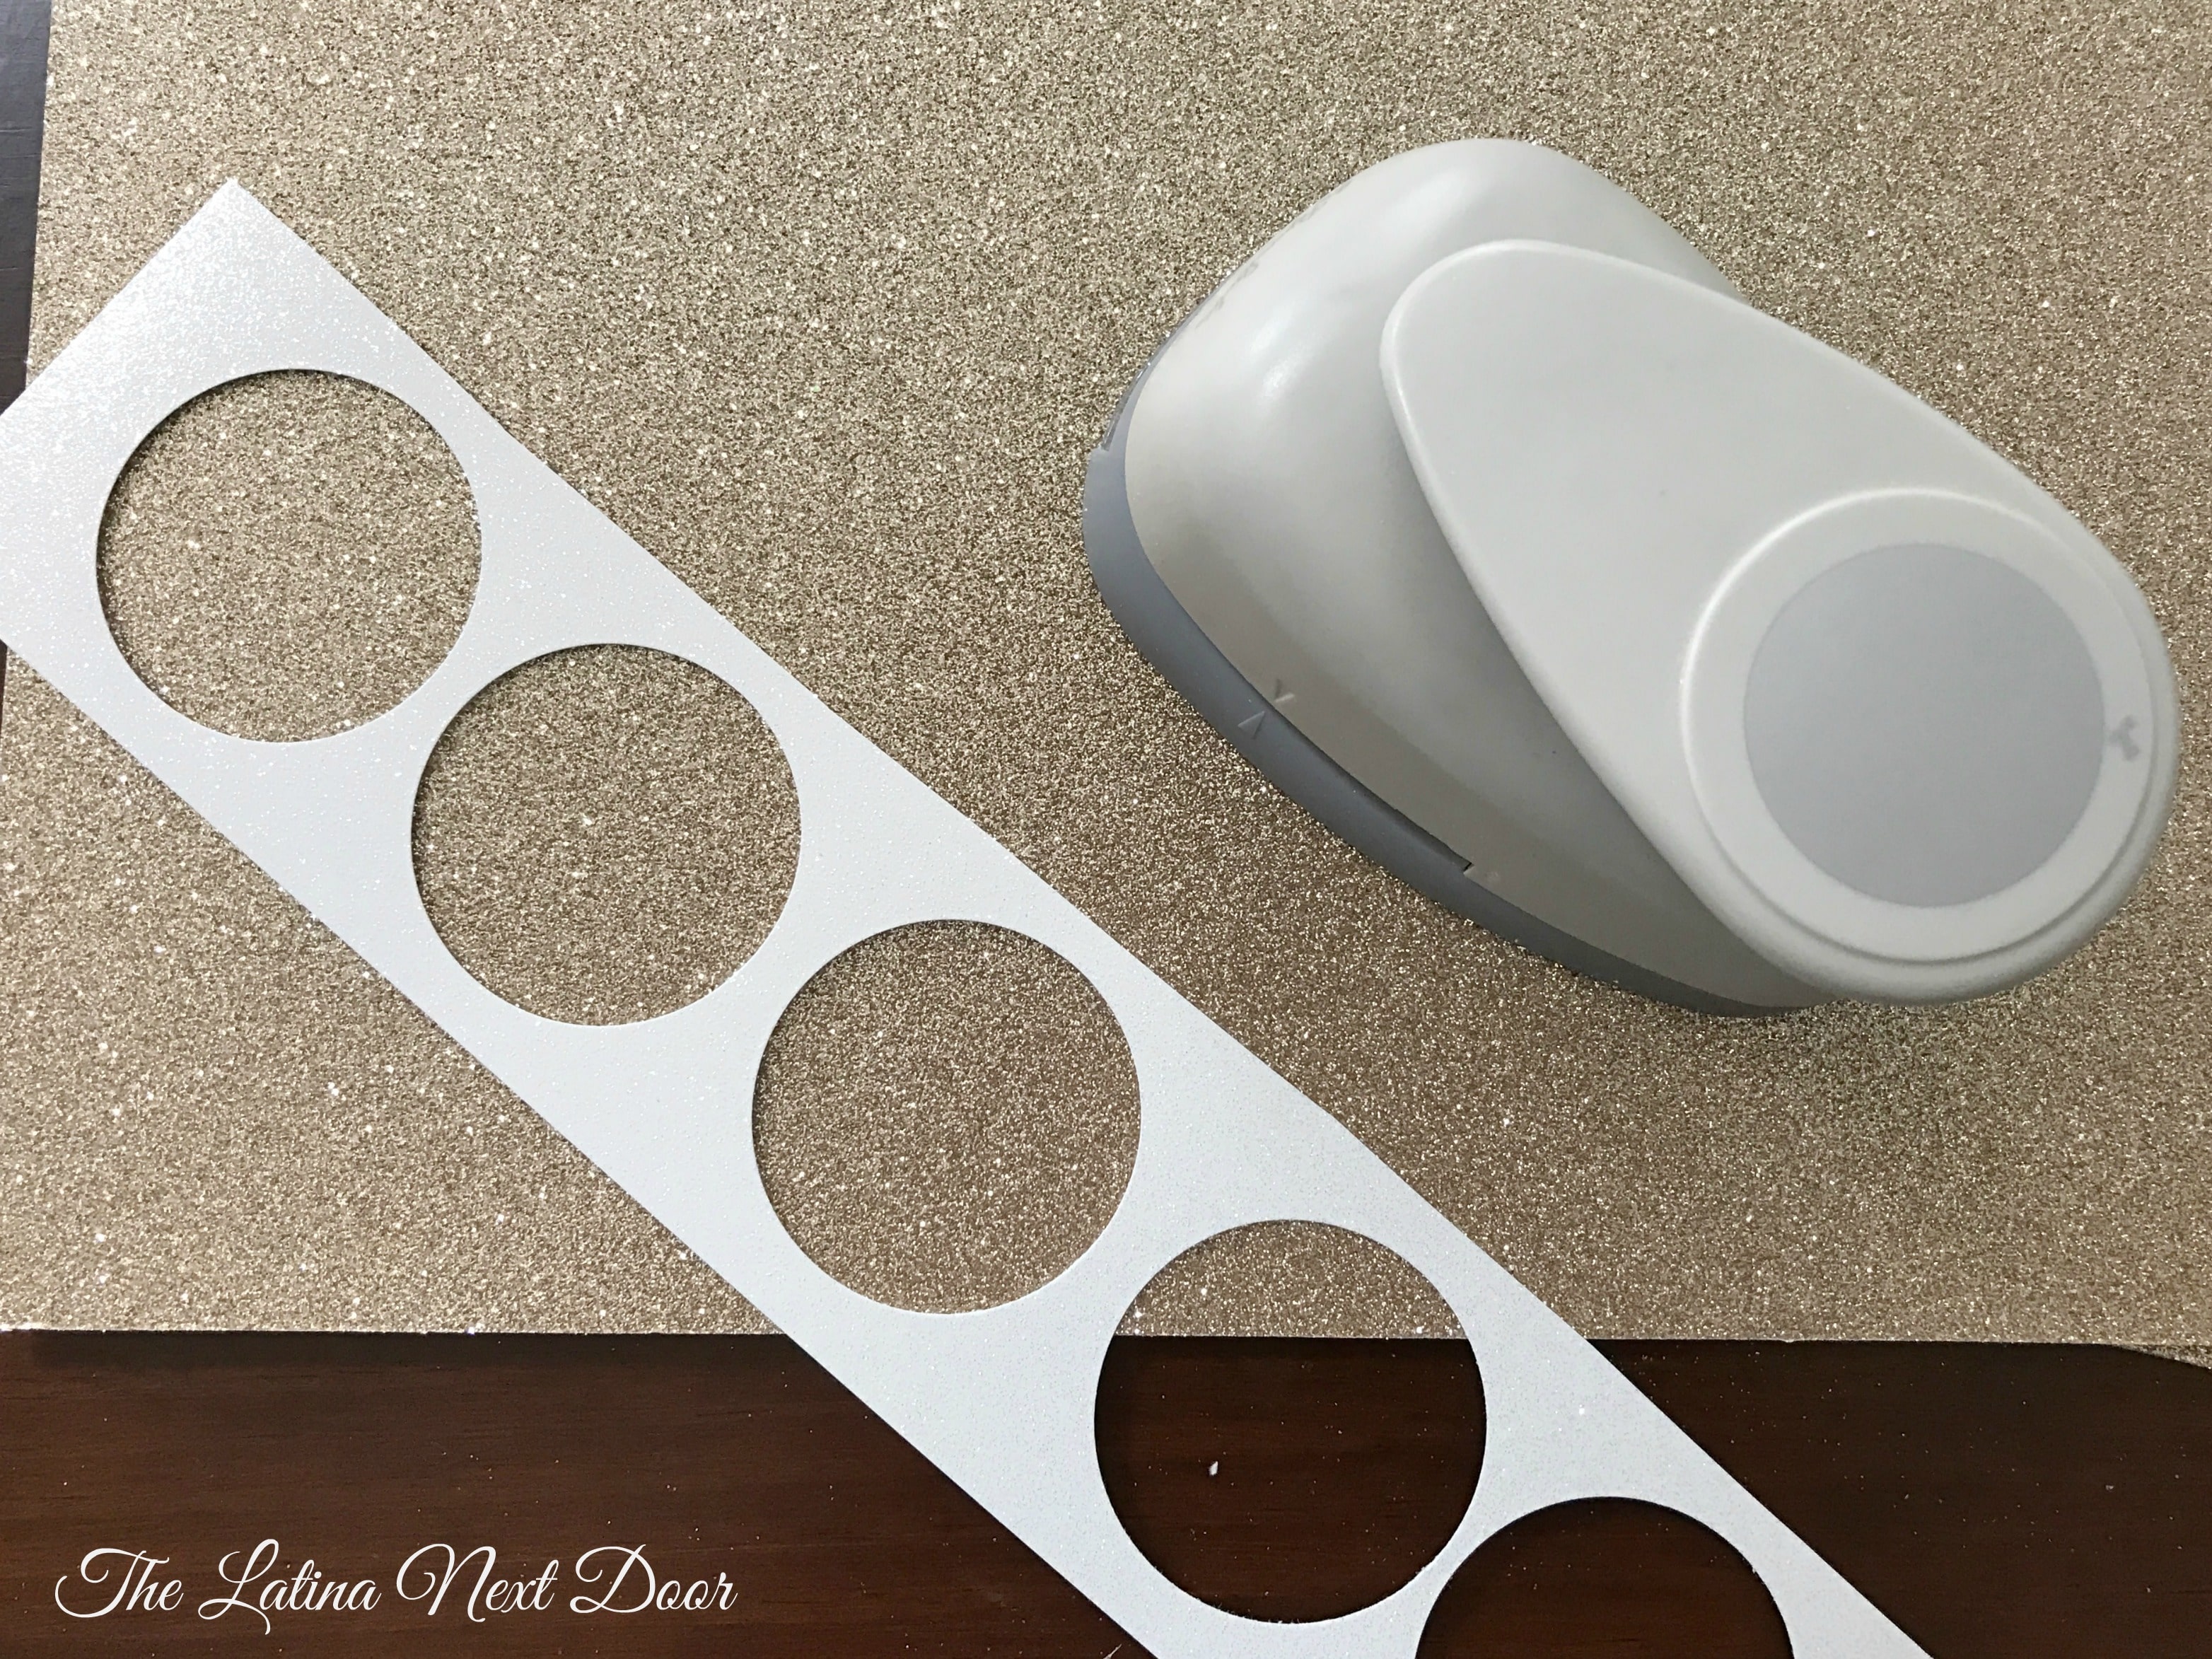
- Punch circles out of sheets
Start punching your circles out of your sheets. I used the hole punch below that I had previously purchased at Hobby Lobby for another project.
- Tie cord onto wooden rings
Once you make sure the wood is dry. Start tying your transparent cord onto the wooden rings and begin gluing your circles onto each string. Make sure to “sandwich” the string with a circle on either side.
To get the exact look as mine, attach 14 strings on the outside ring and 8 on the inner ring. Glue 4 circles on each string on the outer ring and glue 5 circles on each string on the inner ring so it hangs a little lower. Space the circles 1 inch apart and alternate the colors.

- Space Equally
Then when that is done, make sure to space them equally and add a dot of glue to the top of the ring where the strings are so that they won’t shift.

- Attach Ribbon
Attach the ribbon that will hang the mobile. Use hot glue to secure it as well. I chose 4 equally spaced locations to attach the ribbon, but you can always choose more.
You want to start like this: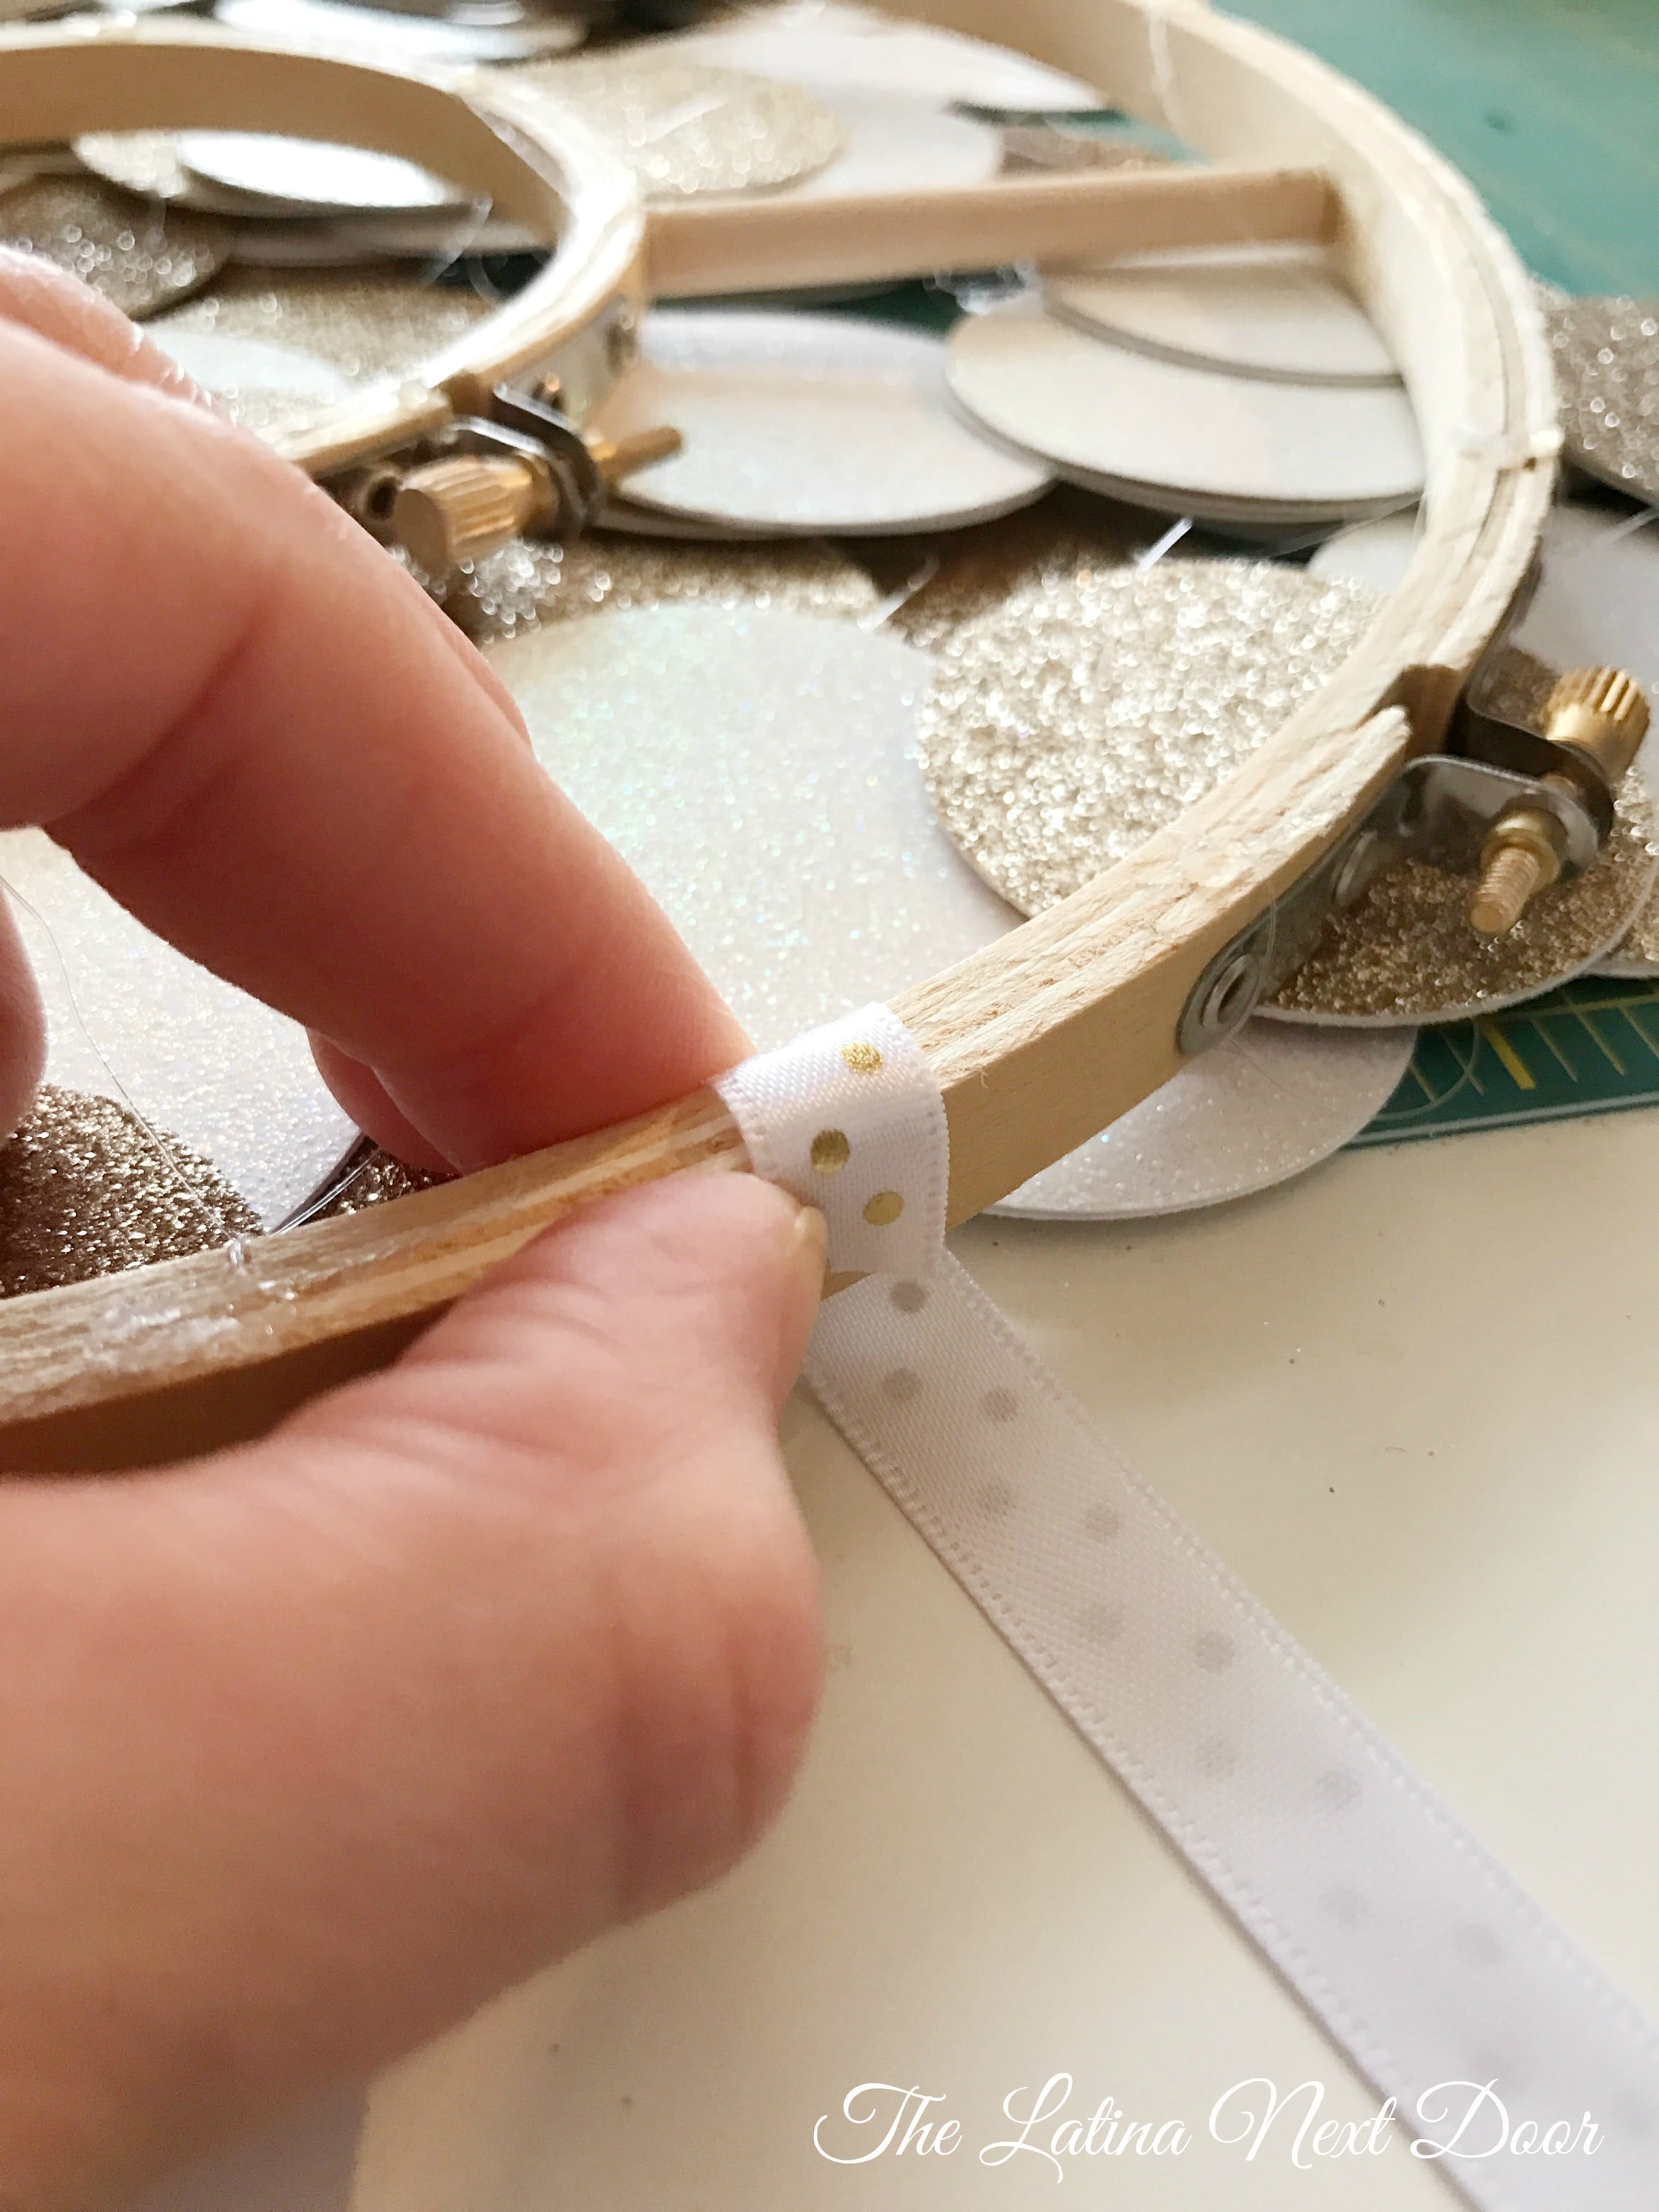

- Add Glue
add hot glue on top of that end piece and secure the ribbon over it giving it a clean look

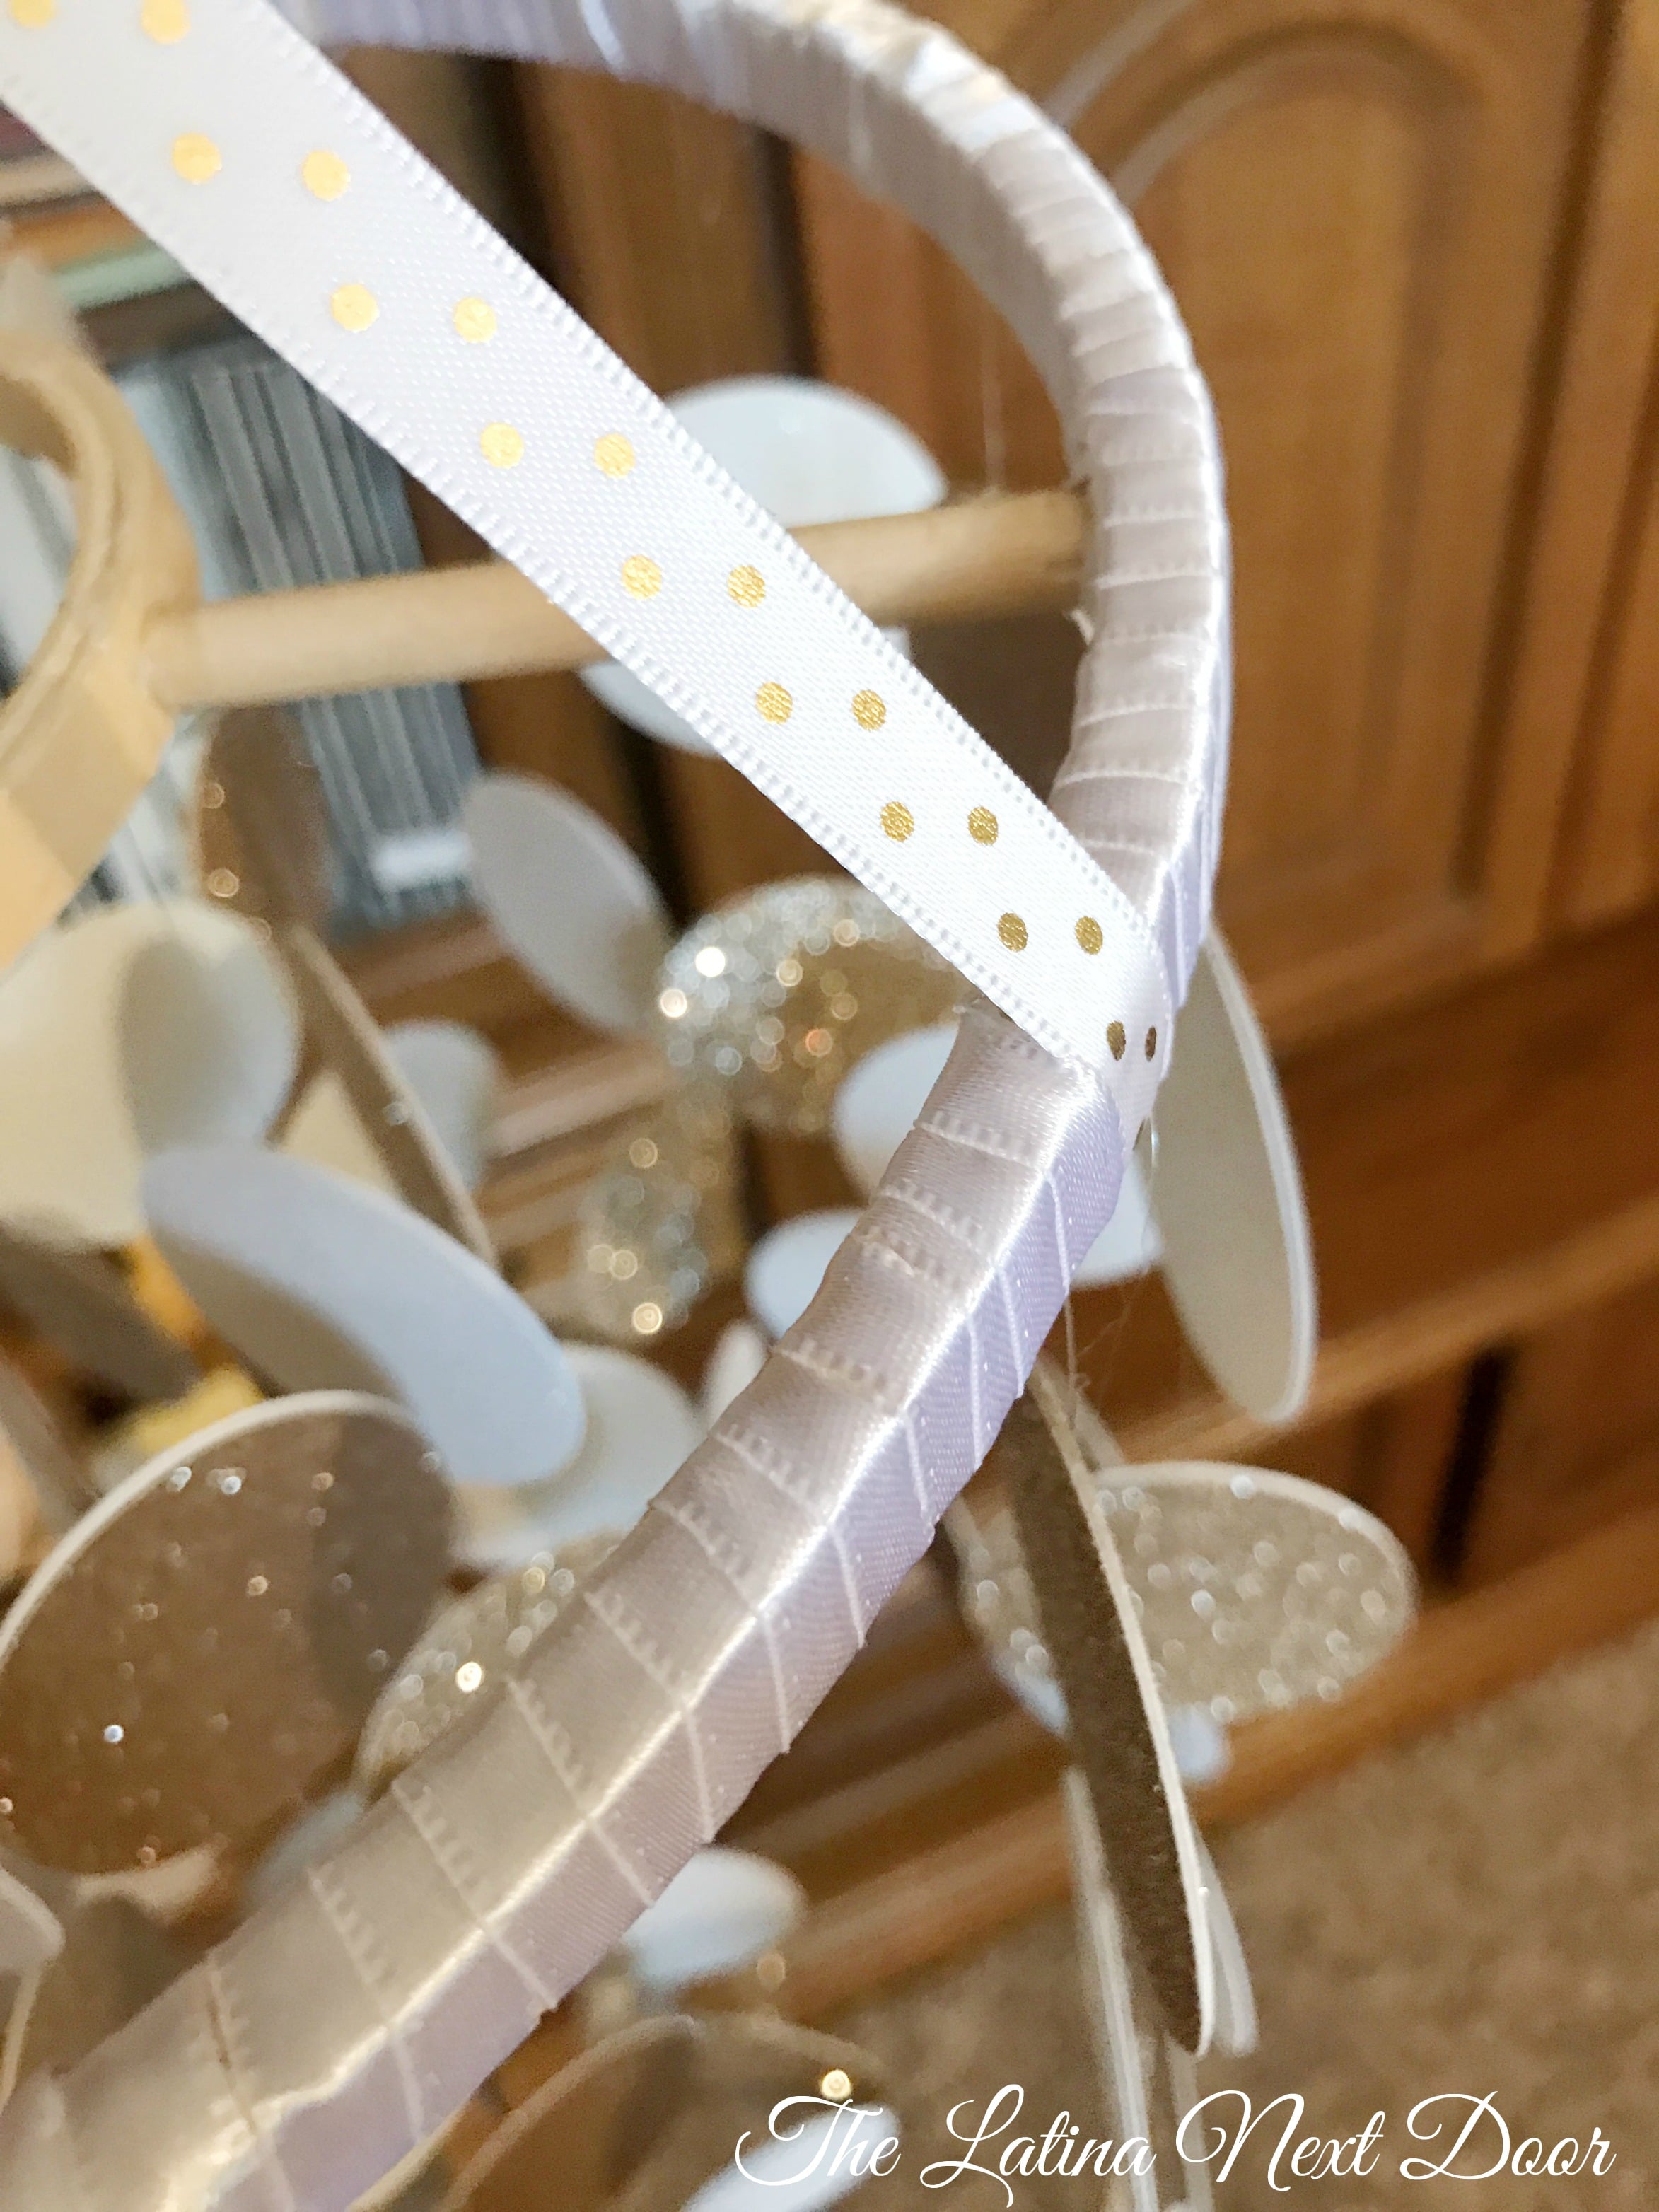
- Cover the Rings
After all of your circle strings are secured and your hanging strings are glued on, it’s time to cover the rings. I used almost 2 spools of simple white ribbon to cover all of the rings and dowels. (Note: You could also choose to paint them with acrylic paint instead of using the ribbon. It would just need to be painted before you attach the strings).
- Add Tulle
Just cut many pieces of tulle about 7 inches in length and literally tie them all over the ring. I also hung a few extra pieces of gold & white chevron ribbon for some added decorative elements.Then remember to clean up the chandelier by cutting any extra transparent cord and/or removing glue gun string.
- Hang Chandelier
Screw your hook into the ceiling where you want to place the chandelier and hang it. That’s it!
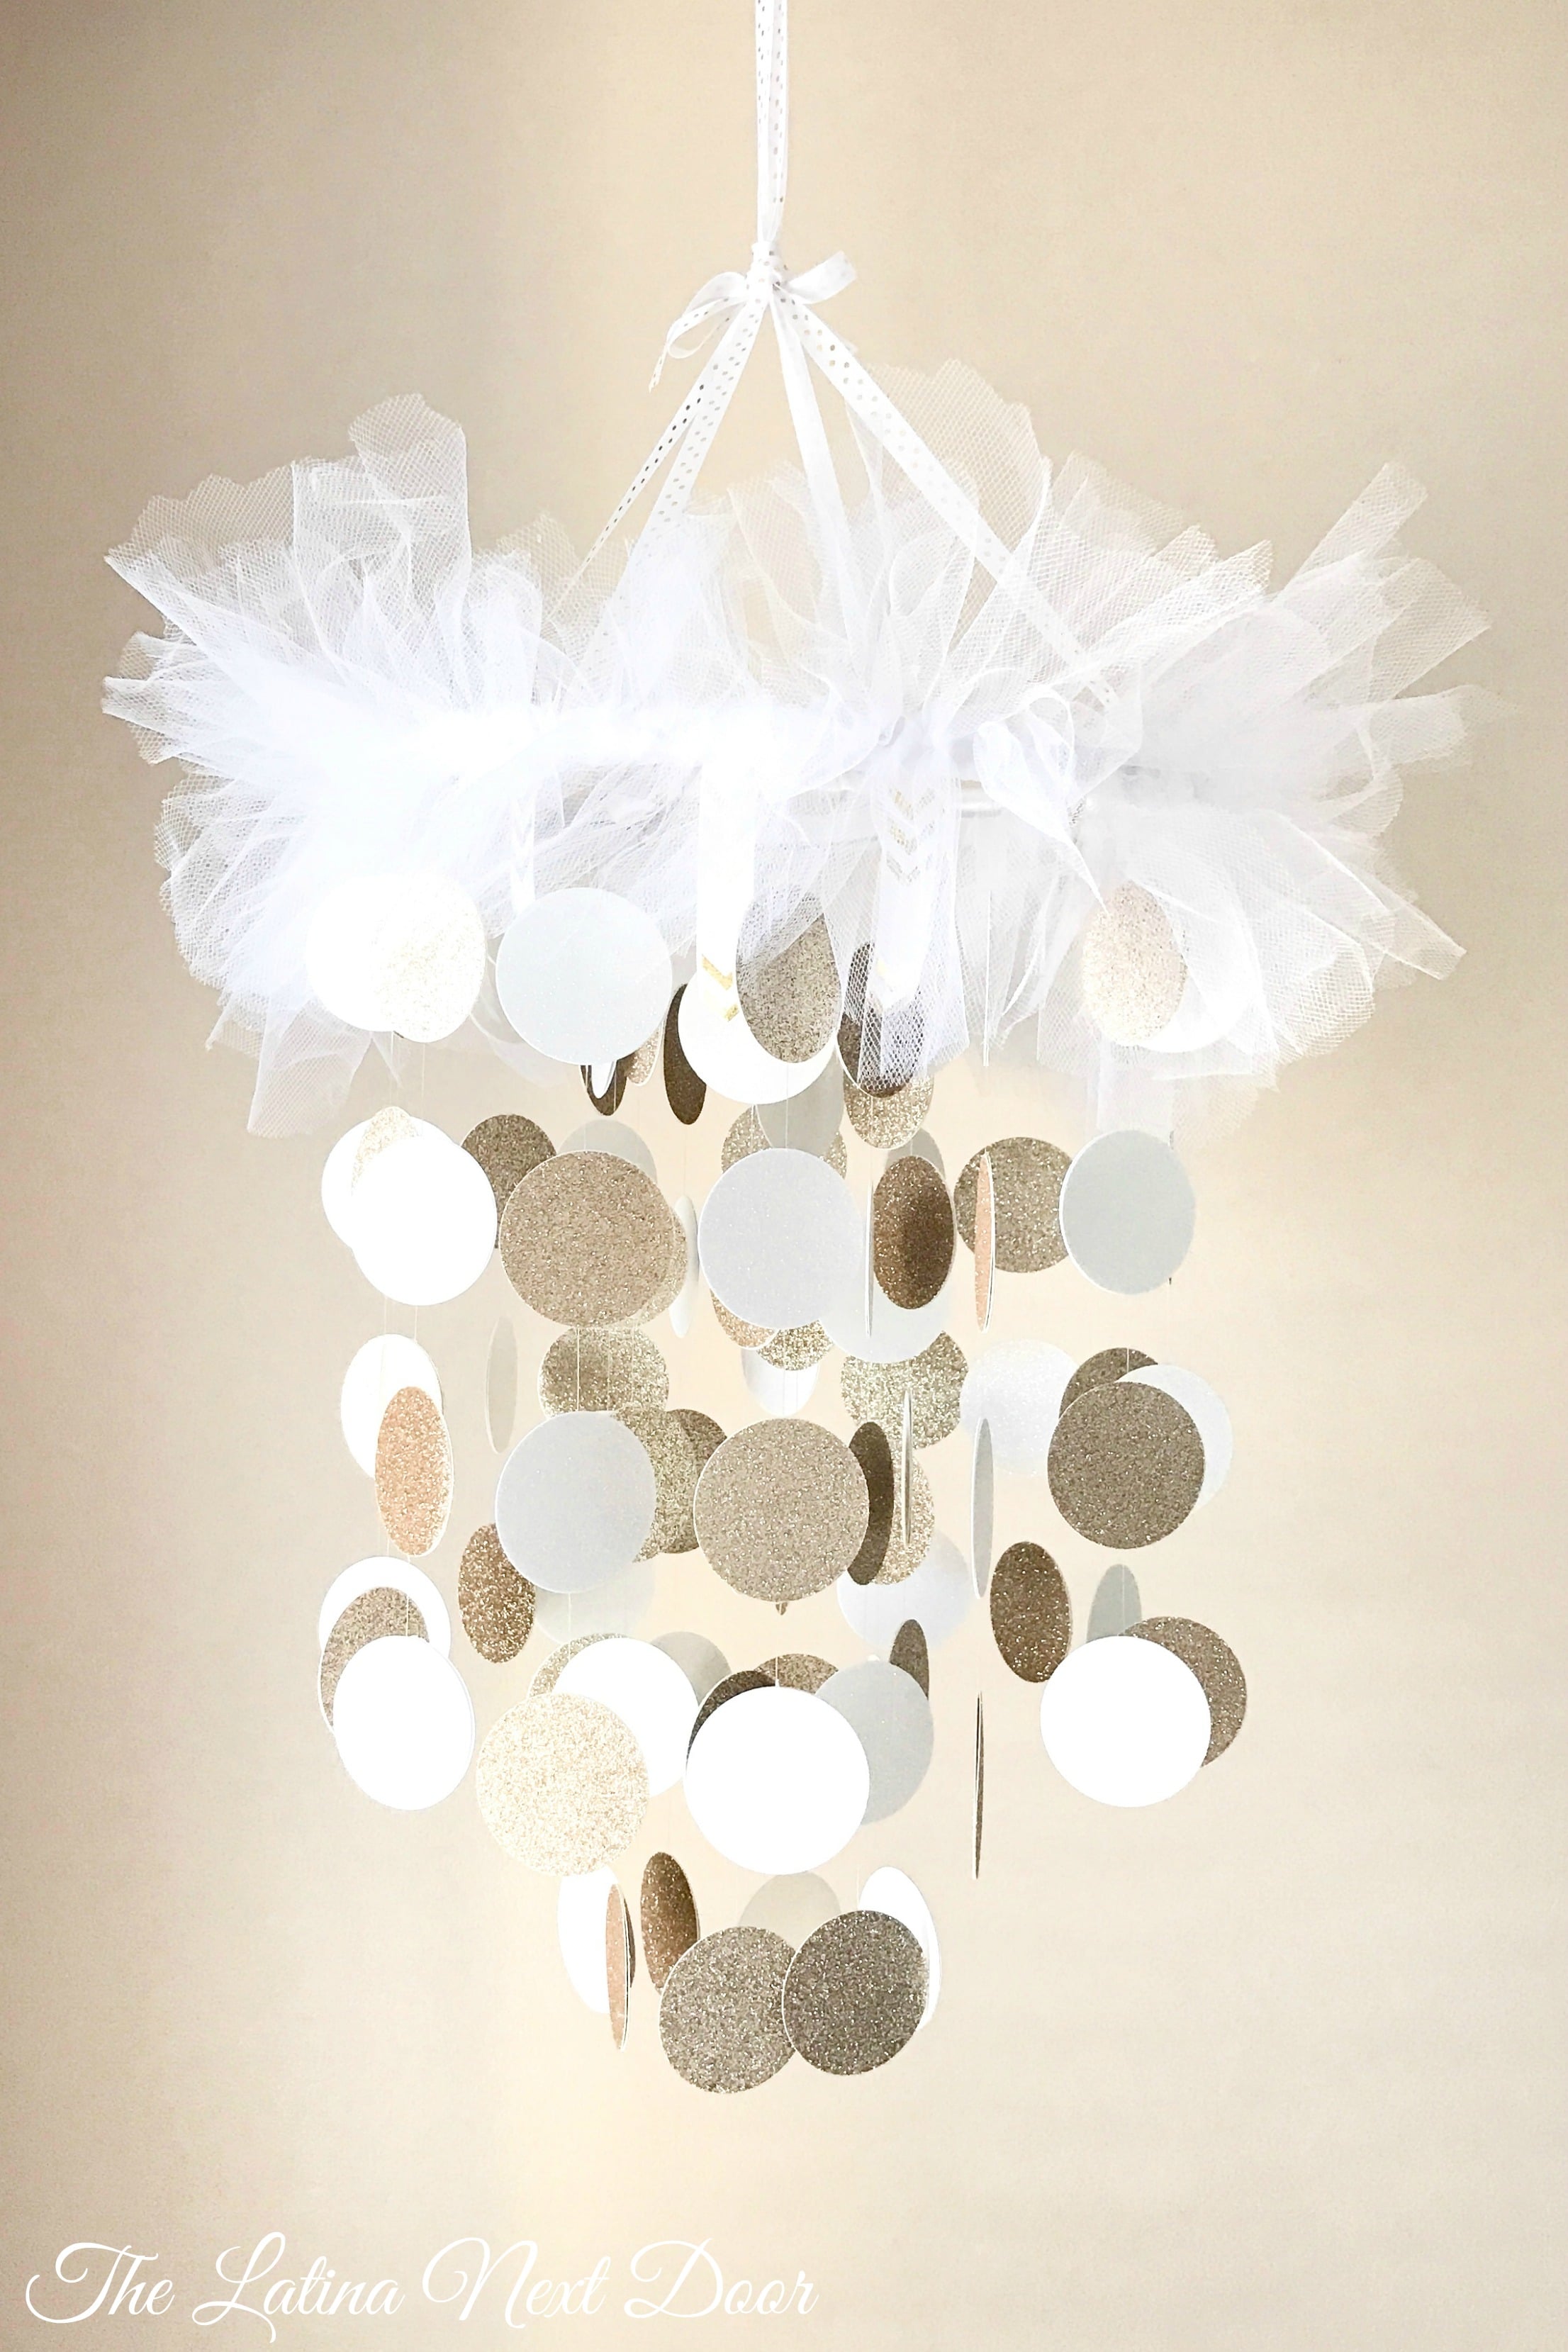
The funny thing is that all of my kids love it, not just the little one. And it looks great in her room.
I hope you enjoyed this diy baby mobile tutorial!
Yami, originally from Puerto Rico is a wife, mother to 3 children, and your Latina Next Door. She blogs about Home décor, DIY, crafts, recipes, money saving tips and all things that will help you live this Vida Divina for Less! You can find out more about her at www.thelatinanextdoor.com and follow her on social media:

Instagram: @thelatinanextdoor
Facebook: www.facebook.com/thelatinanextdoor
Twitter: @Latina_Nxt_Door
Pinterest: www.pinterest.com/yamithelatina
Terrance
Thursday 19th of October 2023
The Hobby Lobby company is known for their hateful discrimination. Please consider using Michael's and other companies that foster an environment that does not perpetuate hate.
Ola | JadoreLeDecor.com
Thursday 18th of May 2017
How adorable is this! I really love how simple and yet elegant it is. Nice job!
Carissa
Thursday 18th of May 2017
I love it too! Yami really did a lovely job! I wish my kids were still little I would totally make one!
Loren
Friday 17th of March 2017
I absolutely LOVE this! Thank you so much for an easy to follow how-to!
Sam
Tuesday 14th of March 2017
What a cute idea! I love that it's so easy too!
Carissa
Wednesday 15th of March 2017
I know! I wish my kids were little again so I could try it!